Friday, 27 March 2015

Crochet Cute Little Baby Sneakers

Baby booties is one of the most adorable essentials for babies. It can be the cutest little gifts for those little pair of tootsies.

Even better if you know how to make one, either by crocheting or sewing, it can be a perfect handmade gift for newborn.

I love crocheting baby booties and I can't never get enough of it. It can be quite tricky for crochet beginners but once you practice and sharpen your skills as a crocheter you will be very much satisfied of your ability to produce such a fine art. 


And the satisfaction you get when your handmade fits those newborn feet? It's just amazing. 

Crocheting a baby sneaker are indeed appealing to myself as a crocheter because it resembles just like the adult sneaker! 

I only start crocheting right after my only son turn 3 years old. So I couldn't make one for him. But I made for most of my family and friends who just had babies. 


You can find free patterns online if you want to make one. But my favorite are the these;

josicroche@blogspot.com


It is in Portuguese, but you can find the English translation at the bottom of the post. 

Enjoy crocheting.

Thursday, 26 March 2015

Mini Flowers - A Decade of Memories


Flowers is the perfect gift for all occasion as it is associated with the feelings of passion. It can serve as Valentine's gift for your ladies (or even men, for those who loves flower? Who knows?), Mother's day for your lovely Mum, for birthdays and also for weddings. 


For myself, I love fresh flowers. Nothing can beat the fresh scent and the smell of garden (for bouquet of flowers) presented right under your nose. And the feeling and moment you experienced after receiving such a beautiful creation of God is just heart warming. 

But it won't last long right? For some people, it is a waste of money because it will eventually die. 


Why not hint your men for the next gift giving occasion with this mini flowers that can lasts up to 10 years. It needs minimum care as you are only required to spray it with water once a day or if the air is humid you can just leave it as it it. But the best part is........*drum roll*.........just when the little flowers are expose with mist of water the bud blooms. And when it is dry the bud tightly closed. You can keep it in your living room, bedroom or office as no sunlight is required.

It is a miniature flower, which is a type of chrysanthemum that is treated with Japanese freezing technology.

You'll definitely need this!


Wednesday, 25 March 2015

How to Crochet a Ribbon


Crochet ribbon is cute and easy way to embellish a crochet hat or any craft project. If you are new to crochet, learn the basic stitches in crochet here.


1. Crochet several chains or until the length of your desired ribbon. Turn.


2. Single crochet the second stitch from your hook to the end. Turn. 
Repeat for several rows until you produced a rectangular shape. At the end of the last row, slip stitch the yarn. 


2. Connect both ends of your crochet piece by slip stitch.


3. This what your crochet piece will look like after slip stitching, sort of like a tube.


4. Tie at the center of the tube to create a ribbon. Easy right!


Attach to your crochet hat! Enjoy! 


Tuesday, 24 March 2015

Crafting with Strips of Paper


I love paper craft. With incredible selection of papers available today, you will find endless creative possibilities you can do with just a piece of paper. Even with a strip of paper, you can roll them, shape them and glue together to create decorative designs.

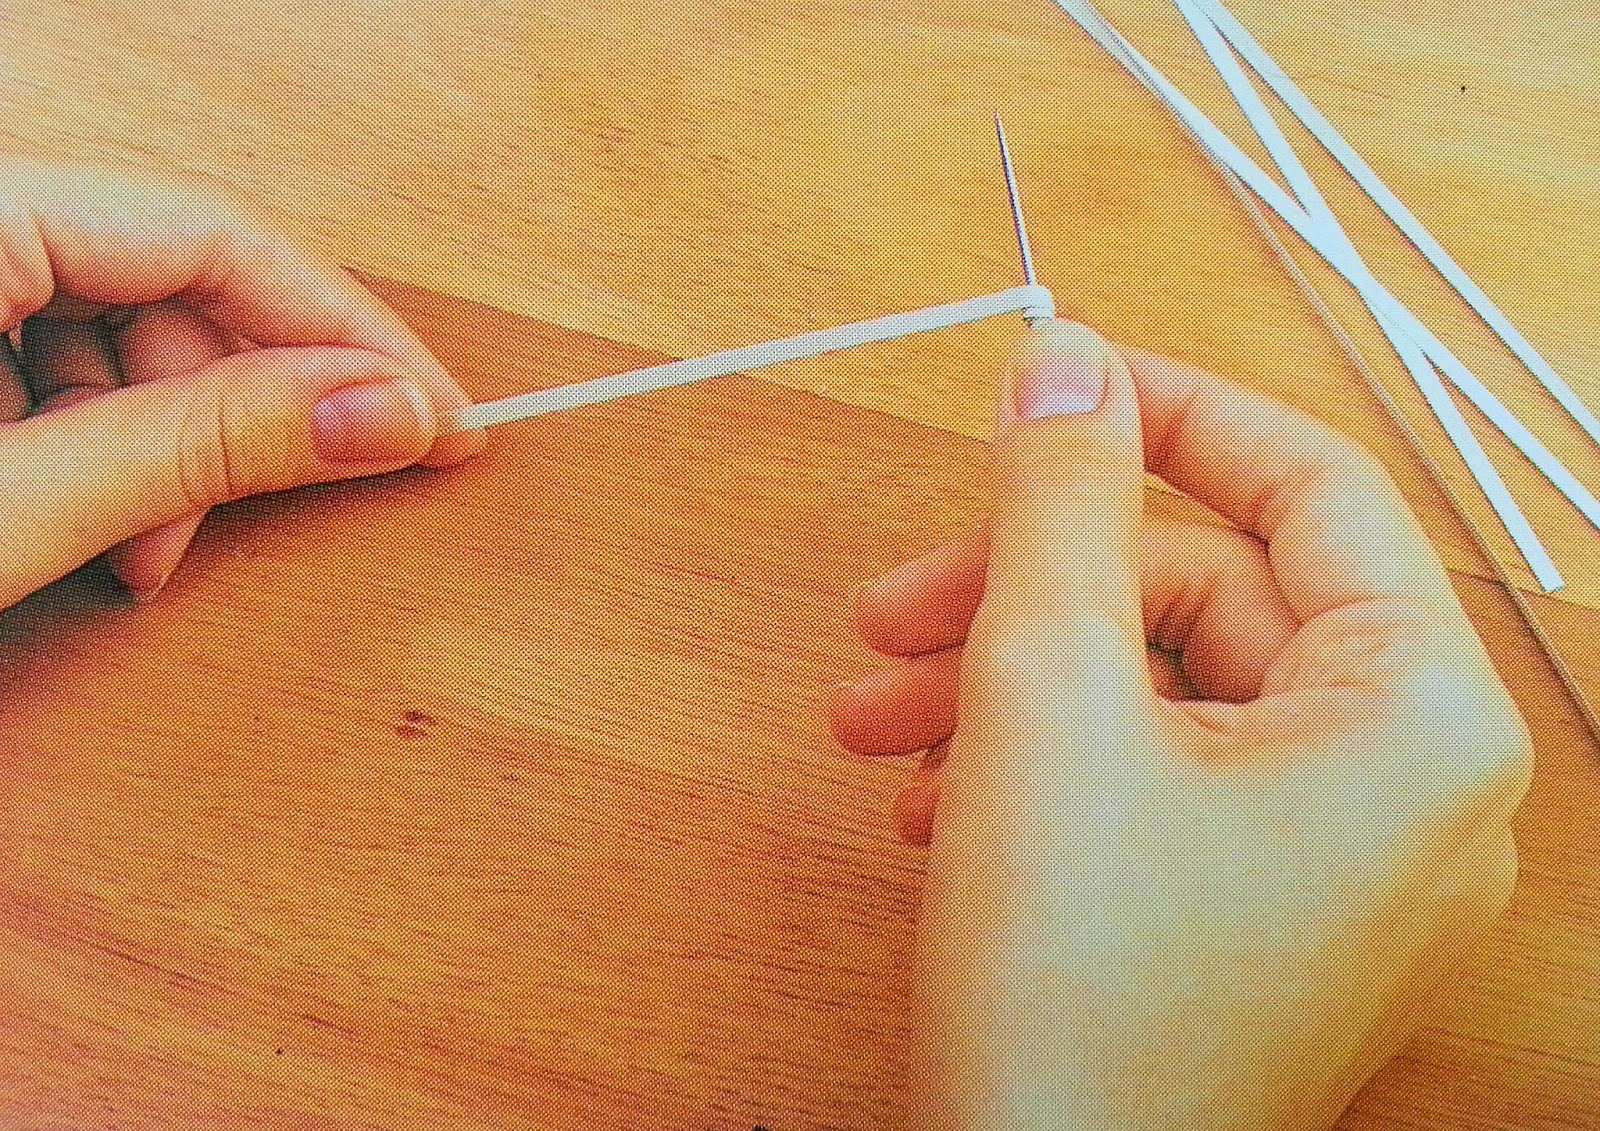
The art of of designing strips of paper are called Quilling. You will be using tools such as slotted tool, a circle template, glue and not forgetting the strips of paper which are also called quilling paper. Alternatively, as a beginner, you could also use toothpick or needle to roll the paper.


Source


Quilled paper projects usually involve two stages, making paper coils, then assembling the coils into a design or pattern. Refer the following basic techniques to create paper coils;

Step 1: Roll each length of paper around your chosen twirling tool (needle, toothpick or slotted tool) beginning at one end of the strip and rolling tightly to the end. 


Step 2: Apply glue to the ends of the strips with a toothpick to secure your quilled shape.


Step 3: Lay the tool on a flat surface and allow the tension of circles to release the desired amount and if you have the circle template you can lay it on the selected circle size.


Step 4: Pinch the sides or ends to create variety of quilled shapes.


You can create almost any shape and use them in your scrapbook, cards or picture frame.

Source


If you have the desire to create your own quilling project, get the supplies at Bavakoo Gifts & Crafts. If you like paper craft, this kind of art can be quite addicting. 

Enjoy.